
Making a Box Joint

This bit is uniquely designed for easily creating strong, beautiful box joints.
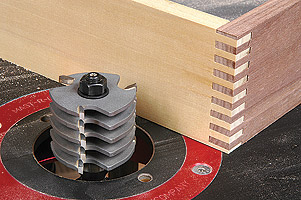

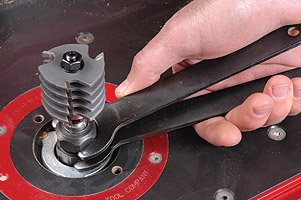
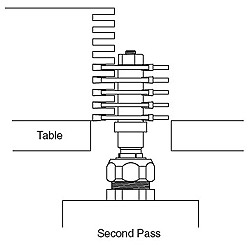
By taking three passes it can be used with stock up to 1/2" thick and 4" wide. To insure a good fit when taking multiple passes it's best to align a cutter on the bit with one of the previous cuts. This is the most accurate way to adjust the height of the bit when making multiple passes. Using the Box Joint Bit Begin by mounting the bit into the collet. Insert the bit into the collet fully, then back it out 1/16" so that the collet does not contact the fillet at the base of the shank.


Now firmly lock the bit into the router collet.

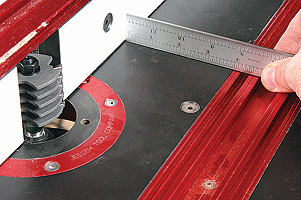
It's important to use the fence on your router table when using this bit. Besides providing a protective barrier, the fence will direct the shavings toward the dust collector. When using 1/2" thick stock use a steel rule to align the fence tangent to the guide bearing on the bit.


For thinner stock position the fence forward of the bearing so that the cutting depth corresponds with the stock thickness. Next, measure each end of the fence to ensure that it is parallel to the miter gauge slot.

Reduce the fence opening as much as possible.
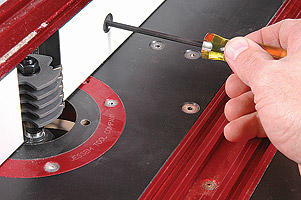

Then adjust the height of the bit. Mark a line at 5/32" and position the lowest cutter on the mark.


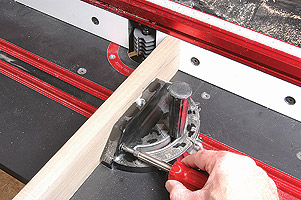
Because you're routing end grain, you'll need the support of a miter gauge. For even greater support, fasten a backing board to the face of the gauge.

Remember to reduce the speed of the router.


With the setup complete, you're ready to make the cut. Clamp the stock to the miter gauge securely and feed it past the spinning bit.


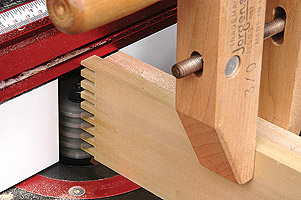
After making the cut on all of the box members, adjust the bit height for the second series of cuts. Now invert the stock, clamp it in position in the miter gauge, and make the second pass.
1. This large bit should only be used in a table mounted router.
2. Use a variable speed router and do not exceed 13,000 rpm.
3. Always use a miter gauge in conjunction with the fence. The miter gauge will guide the workpiece; the fence will surround the bit to provide a barrier.
4. Clamp the workpiece securely to the miter gauge. DO NOT attempt to hold the workpiece with your hand.
5. Use a guard.
6. Use eye and hearing protection.
View Our Box Joint Router Bit