Constructing a Wainscot Door

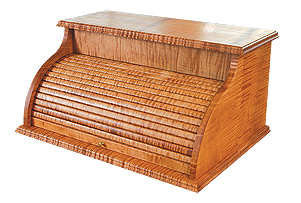
Amana Tool® makes it easy to create beautiful tambours for roll-top desks, computer desks, entertainment centers, kitchen appliance garages, and breadboxes.
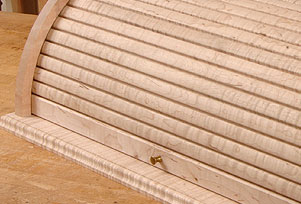

When making a tambour with the Amana Tool® tambour bit set there is no need for cloth or glue. Instead, the slats simply slide together to create a flexible, interlocking ball-and-socket joint.
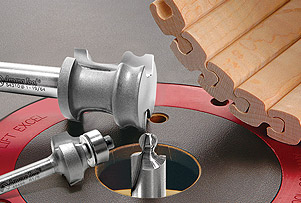

The set consists of three bits. The first bit shapes the face of slats, bit number two shapes the socket, and the third bit rounds the edges of the rectangular slat that forms the end of the tambour.
Mill the Stock
To construct a tambour begin by milling the stock. When milling the stock for the tambour strips rip the stock 1-15/16" wide. This dimension is wide enough to make two strips from each piece.
Mill the Stock
To construct a tambour begin by milling the stock. When milling the stock for the tambour strips rip the stock 1-15/16" wide. This dimension is wide enough to make two strips from each piece.

The oversized stock will provide an extra margin of safety by adding mass and positioning your hands further away from the spinning bits. It’s also a good idea to mill a couple of extra pieces of tambour stock for use when setting up the router.
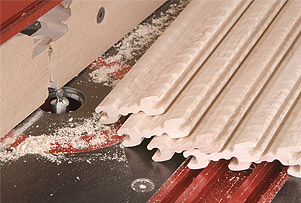
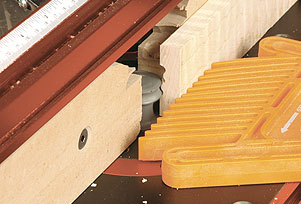
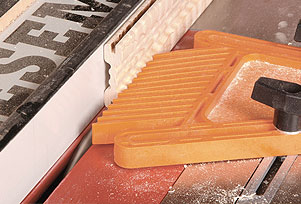
Shape the Tambours Making the tambours is a three step process: shaping the face of the stock, routing the socket, and ripping the stock to final width. For your personal safety as well as for a smooth, accurate cut it is important to use a featherboard and a push stick when routing the tambours.
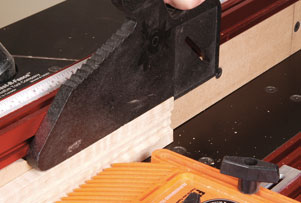
Shape the Tambours Making the tambours is a three step process: shaping the face of the stock, routing the socket, and ripping the stock to final width. For your personal safety as well as for a smooth, accurate cut it is important to use a featherboard and a push stick when routing the tambours.

It’s also a good idea to shape the tambours in two light passes rather than one heavy pass. This not only reduces the strain on the router, it also results in a smoother surface that is free of chatter. Before shaping the face of the tambours use the second bit in the set to cut a test socket in sample stock. This sample will serve as a test piece when sizing the ball on the tambours.
When shaping the tambour slats, each piece of stock must be run through four times because you’re shaping both faces of two tambour slats on each piece of stock.
Shaping the Tambour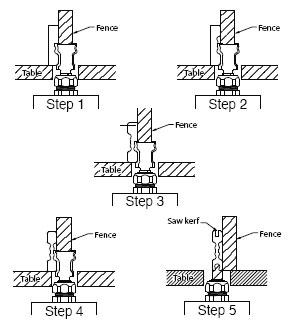
When shaping the tambour slats, each piece of stock must be run through four times because you’re shaping both faces of two tambour slats on each piece of stock.
Shaping the Tambour

Shape the first face.
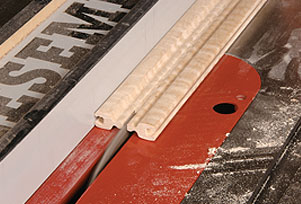
The tambour can easily slide through a groove with a radius of four inches and slides in a groove 9/16" wide.
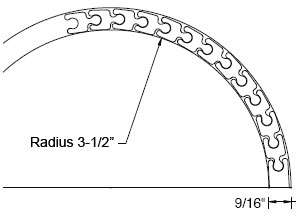
The tambour can easily slide through a groove with a radius of four inches and slides in a groove 9/16" wide.

Then turn the piece end-for-end and shape the second face.

Now repeat the process on the opposite face of the stock. <div > 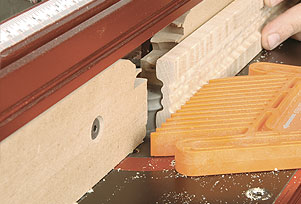

Once all of the tambour stock is shaped the next step is to reposition the fence for a deeper cut and make a second pass. The depth of cut for the second pass is important for smooth operation of the completed tambour. The ball and socket joint must flex smoothly without binding. For the best results, shape a sample and test the fit. 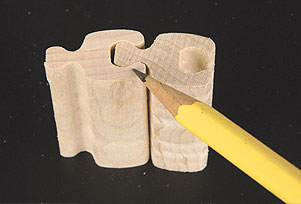

Once you’re satisfied with the fit shape the tambour stock.
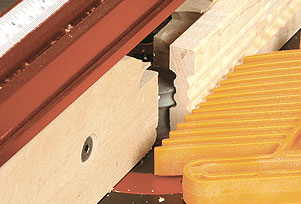

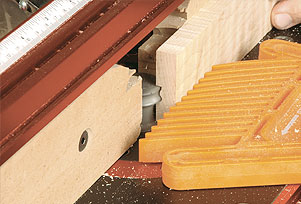
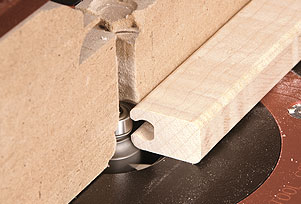
Now cut the socket in the tambour stock. First, use the tablesaw to rip a shallow groove on both edges of each piece of stock to reduce the strain on the router bit.

When position the fence on the router table so that the socket is centered on the thickness of the tambour stock. When routing the socket use a featherboard to keep the stock firmly against the fence.
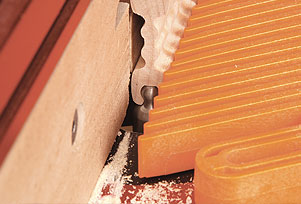

Also, remember to shape the socket on the edge of the stock that serves as the tambour end.
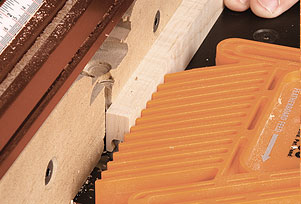

Now rip each piece of tambour stock down the middle to separate the individual slats.

Then round the edges of the stock that serves as the tambour end

The last step is to cut the tambour slats to final length. Measure the distance between the tambour grooves and subtract 1/16”. Before installing the tambour in the groove apply the finish and wax the ends of the slats as well as the groove.