Making Moldings

Beehives?

I just wanted to let you know how much my father, 86 year old carpenter and myself enjoy your books and articles.

\r\n


Would you please advise us on a safe way (router or dado) on how to make the recessed handholds for our homemade bee supers and hive bodies. Thank you and have a Happy New Year!

\r\n

-Cynthia 
Medina, OH

Our Expert


Amana makes a selection of elongated core box bits and the 1" diameter, Amana Tool no.45942, would be a good choice for a handhold on bee hives. The elongated core box bits make a straight-sided groove with a curved bottom.


The elongated core box bits which are larger than 1" diameter require a table-mounted router for safe use. However, the 1" diameter can be safely used in a hand-held router and two overlapping passes of the 1" diameter should make a comfortable handhold.


Because this is a stop cut you'll need to use a plunge router. Also, you'll need a guide bushing on the router sub-base to guide the cut against a template which is fixed to the work piece.


Finally, keep in mind that on the second, overlapping pass, that the bit will only be cutting on one side. It's critical to feed against the bit rotation to avoid climb-cutting and self-feeding.


And thanks for the compliments on my books and articles; it's always good to hear that woodworkers are enjoying them.

Safety when using Shaper Cutters

,  you've helped me before on doing an octagon tapered leg and I appreciate that.  My question has to do with shapers (I have your Shaper book!), I own an older 1/2" spindle Rockwell that I've used for years.  In your opinion, is it safe to run a panel raising bit on it that measures around 4" in diameter?  Of course I'd make the proper safety guards and hold downs but there's something about a bit that large spinning that makes me cautious!  I have done it but am wondering if it's something you'd recommend.  Thanks, you can see my work at www.woodworksbyjohn.com if you'd like.


-John
Las Vegas, Nevada 

Our Expert


The Amana Tool raised panel shaper cutter no.SC652 has a 3/4" bore and is supplied with a bushing for use on 1/2" spindle machines.

With any machine operation, especially the shaper, it's important that you feel safe before
operating the machine. In other words, if it does not feel safe to you, don't try it.


First and foremost, with any shaper operation it is important that the cutterhead is covered by a guard. If your shaper did not come equipped with 

a guard then you should purchase one or construct one.


Page 94 of my book on the shaper shows a photo of a "box" style fence and guard which completely encloses raised panel cutterheads and provides a 3/4" thick barrier between the cutterhead and your hands. Also, with a factory fence a large opening is required to accommodate the large diameter of the cutterhead. In contrast, the box fence uses a very small opening which provides better support to prevent the workpiece from dropping into the cutterhead and kicking back.


The front of the box can be adjusted vertically to allow for panels of different thicknesses, the top of the box is clear acrylic,

and the back has a dust port. The box fence is secured to the top of the shaper with a large C-clamp at each end of the base.


Finally, a 1/2" spindle shaper has a smaller motor and less horsepower than a machine with a 3/4" spindle.


So when using a large panel raising cutterhead it becomes necessary to take additional passes and lighter cuts.

Butcher Block Table Top

How can I flatten the table top using a router?


-Dale C. 

Terre Haute, IN

Our Expert

You can flatten small to medium size planks and tabletops with your router, a jig to guide the cut and Amana Tool Mortising router bit no.45564.


The two-piece jig is a large sub-base for your router which is supported by parallel guide rails that flank the workpiece. The rails are attached to a 3/4" thick plywood base. Because the router is traveling in a flat plane on the guide rails, it will gradually remove the high spots from the workpiece and create a flat surface. Outriggers prevent the router from moving beyond the two outermost edges of the workpiece.


Keep in mind that there are limits to the size of the top which you can work with this technique. If the sub-base on the router is too wide it will sag under the weight of the router.


For your personal safety and for the smoothest possible surface, it is important to take light cuts.

Feed Direction

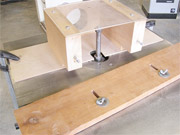
I have a lock miter router bit which I plan to use to secure the corners of a chest.   When I try to make the joint, the bit chews up the work, because there is no way to stop the wood from feeding into the bit.  I saw the wood to 45 degrees before using the bit because it is too difficult to hog off the edge with the router bit.  I am using the bit in a shaper. How should I feed the wood to make the corner joint?


-Lee O. 

Mountain View, MO 

Our Expert

It sounds as though you are climb cutting. Climb cutting is when the workpiece is fed the same direction as the cutter rotation. Instead, the workpiece should always be fed against the spindle rotation. Climb cutting should never be attempted without a power feeder because it is very dangerous. When climb cutting, the machine pulls the workpiece into the bit or cutter and it may pull your hands along with it and cause a serious injury.


Unlike routers, most shapers have a spindle reversing switch. The reversing switch provides greater versatility to the machine. The standard spindle rotation is counter-clockwise, in which case the workpiece is fed from right to left, against the rotation of the spindle. 


If necessary, the shaper cutter can be inverted, and the spindle rotation changed to a clockwise direction. When set up this way the workpiece should be fed from left to right, which will be against the spindle rotation.


Some shapers, like yours, have a collet which allows you to use a router bit in the machine. Unlike shaper cutters which are bored to fit a spindle, router bits cannot be inverted and so you must always use them with the shaper rotating counter-clockwise. And, of course, the workpiece must be fed from right to left.


Also, keep in mind that the top speed of most shapers is typically 10,000 RPM while routers usually run at twice that speed, typically 20,000 RPM or more. So when using a router bit in a shaper it is necessary to reduce the feed rate. 


To increase safety as well as the smoothness of the cut I recommend that youuse featherboards to hold the workpiece firmly to the table and fence. And use a guard whenever possible to shield your handss.


View Illustration

Accurate crosscuts

I am having difficulty with crosscutting panels and getting them square and exact which is necesary for dovetail joining.  I have a chop saw (power miter saw) but that only cuts widths of up to about 8 inches.  I tried making a crosscut sled for the table saw with one runner but it is not very accurate and useless.  I have thought about a sliding type chop saw. I'm also considering an aftermarket crosscutting slide to attach to my tablesaw. What do you think is the best choice?  I am interesting in cutting panels for casework and doors..

Marquette, MI      

Our Expert

Crosscutting wide panels for doors and tabletops is a challenge. The miter gauge on many tablesaws does not provide enough support to the stock for an accurate cut. I have a sliding mitersaw which does a great job but it is limited to a twelve inch wide panel. Aftermarket accessories which attach to the saw are wonderful tools but they are somewhat expensive and unless you operate a production shop they may be out of your price range. 


I suggest that you make a second attempt at the crosscut sled. I've included a photo and drawing of the one I use in my shop. To fine tune the sled to cut precisely 90 degrees, I make fine adjustments to one end of the sled runner. Once the sled cuts square I fasten the runner securely with an additional screw. It can be a bit tedious but once set up a sled is a great way to cut a perfect 90 degree angle on wide panels. However, one drawback to the sled is that the runners wear. I solve that by using hard maple for the runners. Also, when using the sled I push it gently to the left (away from the blade) as I push it forward. This compensates for minor wear on the runners.


Also, I don't use use of the crosscut sled for stock thicker than 1-1/2". Otherwise you'll risk weakening the frame members at the front and back of the sled. 


To construct the sled in the drawing here are the steps that I use:

1. Cut a 3/4" plywood panel to fit the top of your saw. My sled measures 3/4" x 26" x 40".

2. Mill two strips of maple to fit in the miter slots on your tablesaw. The strips should fit precisely because they serve as the runners for the sled.

3. Fasten one runner to the plywood panel at 90 degrees.

4. Now fasten the frame members at the front and back of the sled. 

5. Attach the guards. The guard at the rear of the sled is just a block that is glued to the frame. The block keeps the blade buried at the end of the cut.

6. Test the accuracy of the sled. If necessary make minor adjustments to the runner. Once it is cutting square attach the second runner to add more stability.

For smooth, splinter-free crosscuts I use the Amana Tool Prestige saw blade. And because it is a combination blade I can keep it mounted on the tablesaw when ripping.


Butcher Block

I am using (or trying to) the glue joint bit to join maple boards to make the cutting surface of a butcher block.  I've figured out how to line up the bit to get the pieces to match, but I'm getting alot of tear out as I get to the end of each piece.  I have the speed set correctly (2.2 HP router), the smallest size collet ring, and the smallest fence opening.  But as I pass the last 1-1/2 inches through the bit, it grabs the piece and takes a nice size chunk out.  What am I doing wrong?  Thanks for any tips.                


-Cam M. 

Havertown, PA

Our Expert


It sounds as though you're having trouble with snipe. Snipe occurs when the outfeed fence is not adequately supporting the stock.


The length of the snipe is equal to the fence opening, in this case 1-1/2".


With some types of bits, such as the Amana Tool glue joint bit #55388, if the cutting height is equal to the stock thickness the entire edge of the stock will be removed when routing. In other words, none of the original edge remains on the stock after it passes the bit. Once the stock is no longer supported by the infeed fence it drops into the spinning bit creating a heavy cut, or snipe, at the trailing end.


The key to preventing snipe is in the fence adjustment.

One method is to adjust the outfeed fence forward slightly to compensate for the loss of stock. Sh

apers are designed with a split fence for this adjustment. An micro-adjustment knob allows you to independently adjust the outfeed fence forward. However, most commercial  router table fences lack this feature. Instead, the outfeed fence must be shimmed. Although this method works, it is somewhat fussy because the cutting depth must be adjusted to equal the shim thickness.


The method which I prefer is to adjust the fence tangent to the smallest cutting diameter of the bit. I position a straightedge against the bit and slide the fence forward until it touches the straightedge. This method provides you with the full shape of the profile without a loss of stock and snipe.  


View illustration 


Equilateral Triangular Display Case

I really appreciate the great advice you give in this forum.  I have read the entire archive, and I come back from time to time to read any new posts.  I have learned several things that I can put to use in my own shop.  


I have two different types of cuts that each require a 60 degree angle. The first is a box that, once assembled, creates an equilateral triangle. The sides of the box are 3/8" thick.


The second is an equilateral triangle frame. The ends of the frame members must be mitered at 60 degrees but the tablesaw does not tilt beyond 90 degrees. The frame members are 1/2" thick, 2-1/2" wide and 12" long.


-Brian D. 

Shalimar, FL 

Our Expert

I'm glad to hear that you're benefitting from the Q&A column. Please tell your friends about the column and visit often.


To bevel the edges of the 3/8" thick box panels I would use 
Amana Tool no.49414 chamfer router bit. This bit cuts an angle which is 30 degrees from horizontal which will create a 60 degree angle along the edges of the panel.


To miter the ends of the frame members at 60 degrees just rotate the miter gauge on your tablesaw to 30 degrees.


Kitchen Cabinets & Moulding for larger picture frames

I enjoyed a couple of books that you wrote, "Shaping Wood" and  "The Shaper Book."  I read the "Shaper Book" prior to purchasing a shaper since I am mostly self taught.


I am an amateur woodworker.  I am going to build my own kitchen cabinets.  And I make a lot of molding for picture frames and for my home.  I recently purchased the 88mm Profile Pro aluminum cutterhead for my new 3hp shaper.  It molds beautifully and the finish is much better than expected.   I have a couple of  technical questions where a more experienced person may know a simple solution:


1) I am having a problem with snipe on the last 2 or 2 ½ inches.   All of the wood is being hand fed, and while I’m comfortable doing this, the snipe is irritating.  I suspect that the large cutterhead (larger than the router bits I’ve become accustomed to) is creating a large gap in the split fence.  Would a rub collar help, and what sizes since there are so many blade shapes?  Also, would a power feeder be any help since they are reliant on a fence for support?


 2) The table opening of my shaper is barely too tight to lower the cutterhead(with knives) below table level.  This is definitely limiting, and I plan to purchase the 68mm head just for that reason.   Why are there so many sizes of the cutterheads & does the diameter affect the quality of the cut?


-T. Allen Wyatt

Winter Haven, FL 

Our Expert

The Profile Pro system is one of my favorite style of shaper cutterheads because the head uses interchangeable knives. This provides a tremendous amount of versatility while making it less expensive than purchasing individual brazed cutterheads. There are a number of different profiles to choose from and you can also order blank knives to create a custom profile. For a custom profile take the head, blank knives and a full-scale drawing to a professional sharpening shop.


Snipe is caused when the trailing edge of the workpiece drops into the fence opening slightly. One common cause is that the workpiece is slightly bowed along the length. I avoid this scenario by first jointing the face of the

stock straight and true before planing it to thickness.


Another common cause of snipe with shapers is that the split fence halves are not parallel or in the same plane. For example, if the outfeed side of the fence is just slightly lower than the infeed side the trailing end of

the workpiece will drop into the fence opening slightly. The solution is to fine-tune the fence halves so that they are perfectly parallel and in the same geometric plane.


After carefully aligning the fence halves I suggest that you attach a one-piece wooden auxiliary fence to help further eliminate the problem. Unlike two separate fence halves, a one-piece fence is far less likely to come out of alignment and it also allows you to reduce the size of the fence opening. Reducing the fence opening not only greatly reduces the likelihood of snipe it also increases safety.


Also, consider milling the stock slightly wider and ripping it to final size after shaping. An extra 1/4" in the width above and below the profile provides a "lip" to ride the fence above the cutterhead opening which virtually eliminates the possibility of snipe.


Finally, use featherboards to hold the stock firmly to the fence. Featherboards positioned on both the infeed and outfeed side of the fence will not only aid in eliminating snipe, they will also provide an additional margin of safety.


Regarding cutterhead diameters, as a general rule large diameter heads are designed for larger shapers with spindle sizes in the range of 1" to 1-1/4". The large head diameter is required to provide space for the larger spindle

bore as well as the locking gibs and screws which hold the knives securely in place within the head.   

Planning stage of a piano bench

I'm doing a piano bench that needs to match the pianos eight sided, tapered legs.  I recall you did a pencil post bed with 8 sides.  I do quite a few 2 sided tapers and understand how to do a 4 sided taper with my table saw sled.  How do I go about getting 8 equal sides?  My thought is to support the leg with a center point and have an indexed location for the eight sides but .......?  I appreciate any advice you can give to save me lots of experimentation.


-John
Las Vegas , NV 

Our Expert

Shaping an eight-sided taper is really quite easy; it's really just a four-sided taper with chamfered corners. I use a table-mounted router and a 45 degree chamfer bit such as Amana Tool no.49403

When shaping a chamfer on a taper the cutting depth must gradually and continually increase as you shape from the small end to the large end. The solution is a jig with a tapered base which supports each end of the leg at the correct height.

As you can see from the attached drawing the jig is tapered in both the horizontal and vertical planes.  


View Illustration

Raised Panel Doors

While routing out the raised panels, the cutter is splintering and shattering the wood.  I am using another brands bit and running the router at 12,500rpm.  I am taking small cuts to reach my depth.  What am I doing wrong?  Please help.  Thank you.


-Ed W. 

Saskatchewan, Canada 

Our Expert

Splintering or tearout can occur when routing across the grain; when you route the long-grain edges of the panel the tearout should shape away. However, when you describe the workpiece as shattering it sounds as though it is being grabbed by the bit because it is not sufficiently supported. 


When shaping raised panels on a table-mounted router I use the 
Amana bit no.54117 with excellent results. To provide optimum support for the workpiece as it is being shaped I close the fence halves to create a zero-clearance opening. Then I attach a Paneloc guard/ hold-down. The Paneloc will shield the bit to protect your hands. It also applies vertical pressure to hold the workpiece firmly to the table for a smoother cut. Panel-raising bits are among the largest bits for use in a router. For this reason use a slow feed rate and listen to the sounds of the machine. If it seems to be bogging down take lighter cuts.


Finally, before you shape a panel inspect it closely for small cracks on the ends that are left over from the drying process. Warped, cracked or otherwise defective stock can shatter as it come in contact with a high speed router bit. 


Recommended Tools

Windows sill profile

I would like to replace a number of window sills in my old house. I see that various companies make a traditional window sill router bit. I am looking to use my shaper to do the job. Does anyone make a shaper bit that does the traditional window sill profile? Or can someone recommend a set of bits to create the same look?

Our Expert

Thank you for the question.


I am sorry we do not have window sill shaper cutters. We do however have these profiles in our router bit line. Please check the link below and scroll down to view all the sizes.


http://www.amanatool.com/53822-carbide-tipped-window-sill-edge-7-32-radius-x-1-1-4-dia-x-13-16-x-1-2-inch-shank.html.

Hand Railing

I am working on a hand railing that consists of steel posts with an 2x4 ipe top rail. On the top of each vertical post is a horizontal plate 3.5 in x 2.0 in x 0.17 in thick. The top rail is screwed to these plates. In order for these plates to be flush with the bottom of the wood; 0.17 in. of the wood will need to be removed so the plate can recess into the top rail.


I was provided a 1/4 in thick plywood template to do these recesses. The template is the same size as the needed recess. The corners are 1/2 in radius. The problem I am having is finding the right router bit to do this task. A top bearing flush trim bit seems like the right choice, but all of the ones I have found will make the recess far to deep. I only need to remove 0.17 inches wood.


To uses a collar and straight bit would the template need to oversized due to the clearance gap between the collar and bit?

-Clay

Our Expert


You will not find a straight bit with a shank mounted bearing that cuts exactly .17 inches deep; this is a bit that you
would need to have cust
om made. Because custom made bits are very expensive I suggest that you use a guide bushing on the base of the router along with a straight bit such as Amana Tool no.45419. You'll need to create a template that accounts for the offset between the bit diameter and the bushing diameter.


Toy

For a number of years I have made children's blocks in various sizes and shapes. However, I've always struggled with the precision of the cuts, primarily the angles. As a perfectionist, I am looking for incredibly precise 90 degree angles, but have found that my well-tuned table saw, along with many different jigs, just hasn't met my standard. Am I using the wrong tool? Should I use a bandsaw, router, or planer? I appreciate any suggestions. Thank you!


-Steve 

Beaverton, OR

Our Expert


I make most ninety degree cuts on the tablesaw with an Amana Prestige saw blade #PR1040. As you've already discovered, a well-tuned tablesaw is key. I test the angle of the blade by cutting two pieces of stock and positioning them to test the angle. In other words, to test a forty-five degree angle I miter two pieces of stock and position them within a square. If the joint is not ninety the resulting gap is twice the error. To test a ninety degree angle I simply cut two pieces and 
position them end-to-end on a straight edge.

Dishtop

I'd like to construct a router jig for making a dished top. Can you provide a drawing of a jig similar to the one in your book "The Complete Illustrated Guide To Shaping Wood"?


-Russ L
Fairport, NY

Our Expert


The jig is a set of plywood rails to support the router which is suspended over the circular tabletop. The entire jig is constructed of 3/4" plywood; each rail is constructed of two strips of plywood to form an "L" shape for stiffness under the weight of the router. The base of the jig has a large round opening which accepts a hub. The hub is glued to the underside of the top and works as a pivot for rotating the top. I've provided a drawing of the jig to help you visualize it further. Here are some other things to keep in mind as you construct the jig:

-- It is important to size the jig to fit your brand of router and the diameter of the top which you are making

-- Attach a square baseplate to your router

-- Clamp the jig to the top of your workbench

-- Always clamp the router firmly in place in the jig before pivoting the top

-- Take light cuts

Recommended Router Bits for this project 


Mortising Router Bit Tool No. 45505
Core Box Router Bit Tool No. 45904
Round Over Router Bit Tool No. 49701

CD cabinets?

How do you rip thin strips on a radial arm saw without the wood splitting and kicking back.?


-Joseph

Lewes2323

Our Expert


Sorry, but I wouldn't rip thin strips on a radial saw. For that matter, I wouldn't rip at all on a radial saw. In my opinion, ripping on a radial-arm saw is just too dangerous. The fence on a radial saw is a crude affair may not be parallel to the saw blade which can cause a kickback. Also, there is too much exposed blade, especially at the trailing end of the cut.


In my opinion, radial saws do a good job of crosscutting (not a great job because the point of contact is just too far from the support, or arm, and even the best radial saws suffer from deflection and wear on the arm. They also need constant tuning to cut precisely.


Instead, I do all ripping on a tablesaw. Today's tablesaw fences are robust and can be finely tuned to ensure that they're parallel to the blade. The blade height can be adjusted to suit the stock thickness and , when adjusted properly, much of the blade is safely below the saw table during ripping. And, as you can see in the attached photo, I always use a guard and splitter or riving knife.


To rip narrow stock on the tablesaw safely, I use a simple "L" shaped jig. The workpiece fits into the "L" and the jig positions my hand a safe distance from the blade. A piece of thin plywood attached to the top of the jig provides downward pressure.

For everyday light ripping I use the Amana Prestige Saw Blade PR1040. When I have a lot of ripping to do I switch to the Amana no.RB1020 European Rip Blade.

© 2021 Amana Tool Corporation