I currently make tenons on my table saw. I use a pair of spaced blades to saw the cheeks in one pass using a (vertical) tenoning jig, which gives me very consistent control of the tenon thickness. I then cut the shoulders using my miter gauge or sliding table and a crosscut blade.
Recently, I have added a very nice sliding table to my router table. I have a very powerful 3 1/4 hp variable speed router (PC7518) mounted in this table, which has soft start and is capable of running as slowly as 12,000 rpm.
I am considering buying a quality 6" sawblade with 1/2" arbor hole--- which the manufacturer states as safe to run at speeds up to 15,000 rpm, and ideal to run at approx. 11,5000 rpm --- and mounting it in the router table in order to saw tenon cheeks with the workpiece clamped horizontally to my sliding table, rather than vertically in the tenoning jig on the table saw.
To mount the sawblade into the collet, I would use the 1/2" spindle from one of my grooving style router bit sets.
So long as the router speed is held to 12,000, the blade adequately guarded (I'll make a special fully protective shield setup), and the workpiece clamped securely to the sliding table, do you think this setup would be safe and effective?
(Part of the reason I'm interested in going this route is that my router table also has a high-precision lift, which would make adjustment of the position and thickness of the tenon very convenient and extremely accurate.)
As always, thanks for your expert opinion.
Champaign, IL
- Michael
Our Expert
In my opinion a six inch diameter blade or cutter is too large to be safely mounted on a 1/2" router bit arbor. Unlike a power saw with an arbor, a router bit shank is held in place only by the compression of the collet. 6" exceeds the diameter of even the largest router bits and places too much lateral stress on the collet.
I cut a lot of tenons for furniture and so over the years I've tried a number of methods for cutting tenons. But I continue to use the Amana Prestige dado set with the stock lying flat. As you've discovered, standing the workpiece on end is awkward unless the stock is short. Also, standing the stock on end with a jig does not work well with wide stock for case parts. And using two blades with a spacer always requires a time-consuming second set-up to cut the tenon shoulders.
With the stock lying flat only one set-up is required. If the stock varies in thickness any variation ends up in the tenon. However, with a modern planer I have not had that problem.
Probably your best solution, if you cut large quantities of tenons, is to purchase a tenon machine. The stock runs horizontally between two shaper type cutterheads. The cutters can be adjusted independently to create an offset tenon or offset shoulders. Tenon machines are the most efficicient and accurate method that I've used for cutting tenons.

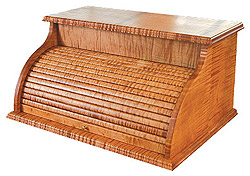 When I constructed the breadbox in the promotional photos I used tiger maple. I also used a traditional finish which adds depth as well as color. I've outlined the finishing steps under the "