
Build Rattle-Free Flat Panel Cabinet Doors

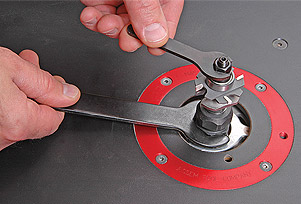
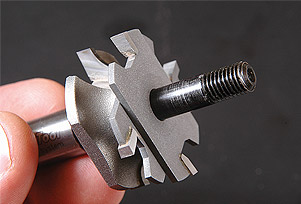
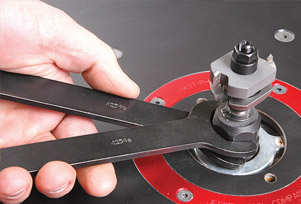
Begin by locking the bit into the collet of your router. This will allow you to safely grip the bit for removing the arbor nut.

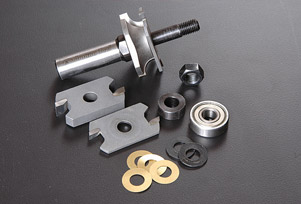
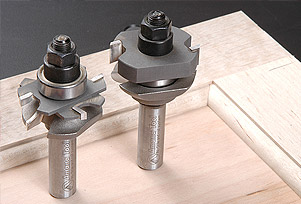
Now remove all of the parts except for the profile cutter and the shims directly above the profile cutter. Lay the parts out on a smooth surface and familiarize yourself with them.

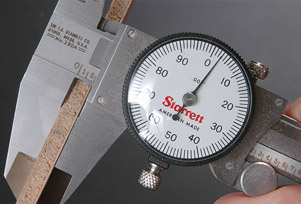
Now you'll want to replace the groove cutters and shims on the arbor in a combination that matches the thickness of the plywood panels that you're using. For greatest accuracy, it's best to measure the plywood thickness with a dial caliper.

Using the drawings as a guide, stack the parts on the arbor to a width that corresponds with the plywood panels.(See Diagram below for both 1/4 & 1/2 plywood panels)
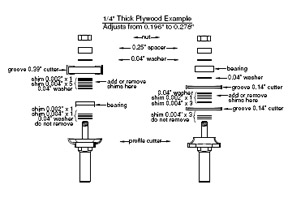
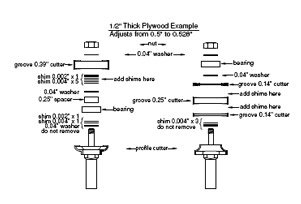

As you stack the parts, position each cutter ninety degrees to the previous cutter so that the carbide tips don't contact.

Also, as you stack the cutters on the arbor, it's important that they face counterclockwise as you view the bit from above. The cutters are marked on the face to guide you.

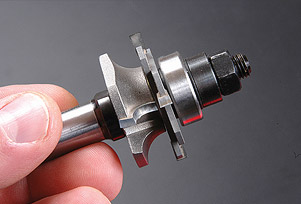
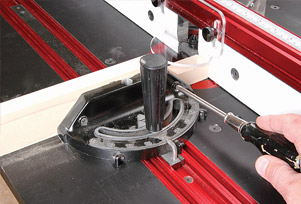
Once all of the parts in position, replace the arbor nut and tighten it firmly with the supplied wrench. At this point the bits are set up and you're ready to set up the router table.

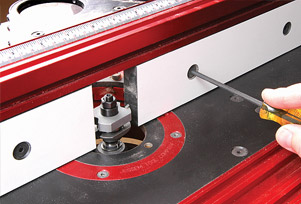
Begin by mounting the cope bit in the router. Insert the bit into the collet fully and then back it out 1/16" so that the collet does not contact the fillet at the base of the shank.


Tighten the collet firmly.

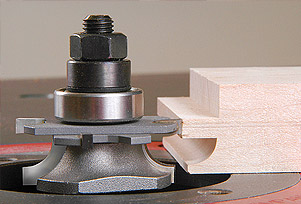
Next, adjust the height of the bit to create a 3/32" shoulder at the top of the profile.


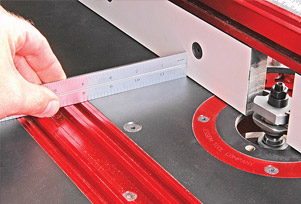
Adjust the fence so that it is tangent to the bearing on the bit.


Measure each end of the fence to ensure that it is parallel to the miter gauge slot.

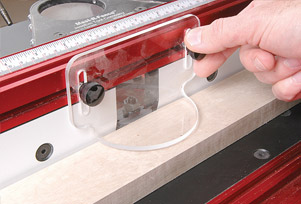
To maximize stock support and increase safety, reduce the fence opening as much as possible.

Position a guard over the bit.

Attach a backing board to the miter gauge to eliminate tearout on the trailing edge of the stock.

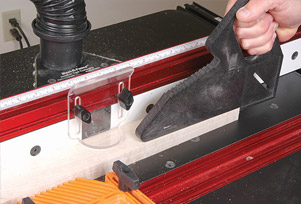
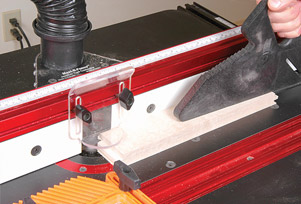
At this point the setup is complete. Position the stock face down against the fence and the miter gauge and make the cuts on the ends of the rails.

Now switch to the stick bit. Adjust the height of the bit to correspond to the first cut.

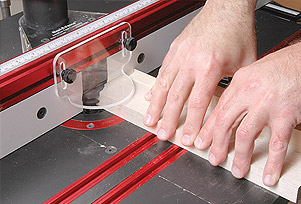
Position the guard in place in front of the bit and above the stock. Now use a push stick to feed the stock face down. A featherboard keeps the stock firmly against the fence.

Remember to shape the rails, also.

Now you're ready to assemble the door.
1. These bits should only be used in a table mounted router.
2. Do not exceed the maximum RPM of 28,000.
3. Always feed the stock from right to left, against the rotation of the bit.
4. Always use the miter gauge in conjunction with the fence when routing with the cope bit. The miter gauge will guide the workpiece; the fence will surround the bit to provide a barrier.
5. Use a push stick when routing with the stick bit.
6. Use a guard.
7. Use eye and hearing protection.
View Our Complete line of Instile & Rail Router Bit Sets