
How to Make Picture Rail Moldings
Years ago pictures were hung from a picture molding which ran around the top of the wall in each room. Wires were attached to the back of the picture frame; the other end of the wire attached to a metal clip. The clip was then hooked over the top edge of the picture molding.
Picture moldings typically have a round top edge approximately 5/8" in diameter which holds the clip. Like many moldings, picture molding can be made in several cuts on the router table using a selection of bits. When making multiple passes to create a molding, the most important consideration is to always have flat surfaces of the stock against the fence and table for good support during shaping.
The illustration shows how to shape a picture molding in five steps using three bits, Amana Tool no.51559 Bullnose router bit, Amana Tool no.49360 Super Rabbet bit, and the Amana Tool no.54162 Corner Bead bit.
See Illustration of picture rail molding
![]()
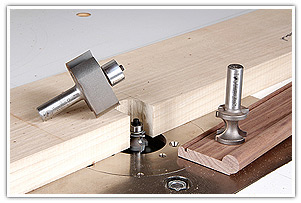
Step 1
![]()
Step 2
![]()
Step 3
![]()
Step 4
![]()
Step 5